
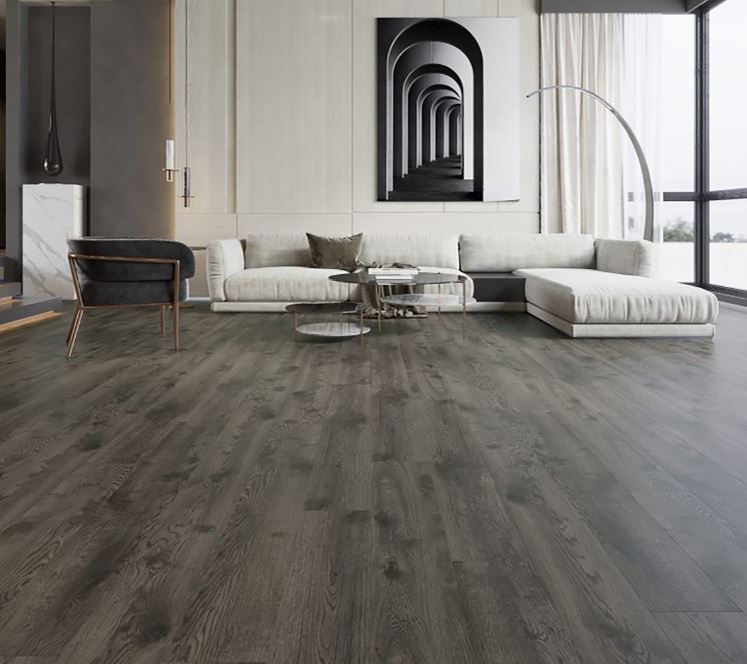
When it comes to stylish, durable, and low-maintenance flooring, SPC flooring has become a top choice among modern homeowners and interior designers. Whether you’re upgrading a living room, redesigning a kitchen, or finishing a rental property, SPC flooring offers a sleek, realistic wood or stone look—without the hefty price tag or high maintenance.
But here’s the best part: you can install SPC flooring yourself. That’s right. With a bit of prep, patience, and the right tools, you can go from DIY enthusiast to interior hero—no professional installer required.
In this step-by-step guide, we’ll walk you through everything you need to know to install SPC flooring like a pro.
What Is SPC Flooring and Why Choose It?
Before we dive in, a quick recap. SPC stands for Stone Plastic Composite, a type of rigid core vinyl flooring that combines limestone powder, PVC, and stabilizers. The result? A waterproof, dent-resistant, and dimensionally stable plank that clicks together easily—perfect for DIYers.
Key benefits:
- 100% waterproof
- Scratch and dent resistant
- No glue or nails required
- Suitable for kitchens, bathrooms, and basements
- Easy to maintain
Step-by-Step SPC Flooring Installation Guide
Gather Your Tools and Materials
Before you start, make sure you have the following on hand:
Tools:
- Tape measure
- Utility knife
- Rubber mallet
- Tapping block or pull bar
- Spacers
- Level
- Pencil or chalk line
- Safety gloves
Materials:
- SPC flooring planks
- Underlayment (if not pre-attached)
- Transition strips (for doorways or room changes)
Pro Tip: Most modern SPC planks come with built-in underlayment. If yours don’t, you’ll need to install a moisture barrier or foam underlayment first.
Prepare the Subfloor
Proper subfloor preparation is essential for a flawless finish.
- Clean the surface: Remove old flooring, nails, staples, and any debris.
- Check for level: Use a level to ensure the subfloor is even. Fill dips and sand down high spots.
- Dry & sound: The subfloor must be completely dry and stable. Moisture can impact plank stability.
SPC flooring can be installed over concrete, plywood, or even existing vinyl/ceramic tiles (if in good condition).
Acclimate the Flooring
Let your SPC flooring adjust to the room’s temperature and humidity. Leave the boxes in the room for at least 48 hours before installation. This reduces the risk of expansion or contraction post-installation.
Plan Your Layout
Start planning from the longest, straightest wall in the room—ideally the one most visible when entering. Use a chalk line for alignment.
- Measure the room and calculate how many rows you’ll need.
- Dry lay a few planks to visualize the pattern and fit.
- Make sure your final row is not too narrow. If it is, cut the first row slightly to balance it out.
Design tip: Stagger plank joints by at least 6 inches to create a natural wood look and enhance structural stability.
Install the First Row
- Place spacers along the wall to allow a 6–10mm expansion gap.
- Lay the first plank with the tongue side facing the wall.
- Connect the second plank by angling the tongue into the groove and snapping it down.
- Continue until the first row is complete, trimming the final plank as needed.
Use a utility knife and straight edge to cut planks—just score and snap.
Continue Laying Rows
- Start the second row with a plank at least 6 inches shorter than the first to stagger the seams.
- Insert the tongue of the new plank into the groove of the previous row at a 15–20° angle, then press it flat.
- Use a rubber mallet and tapping block to ensure a tight fit without damaging the locking system.
Continue this method row by row, checking alignment and spacing as you go.
Cut Planks for Edges and Corners
Use a jigsaw or fine-tooth saw for detailed cuts around corners, door frames, or odd angles. Always measure twice and cut once!
Don’t forget to leave that expansion gap along every edge of the floor—even around pipes and columns.
Install Transition Strips and Trim
Once the floor is laid:
- Remove the spacers.
- Install transition strips where the SPC meets other flooring materials.
- Reattach baseboards or add quarter-round molding to cover expansion gaps.
Final Thoughts: Enjoy Your Designer-Look Floors
Installing SPC flooring dubai is one of those rare home improvement projects that offers a high-end look with minimal effort and budget. It’s DIY-friendly, requires few tools, and delivers professional results when done with care.
With this guide in hand, you’re ready to tackle your flooring makeover from start to finish. So roll up your sleeves, snap those planks into place, and enjoy the satisfaction of transforming your space—like a pro.